 Hao's learning log
 Photo by Lindsay Henwood on Unsplash
Setting up Gatsby incremental build on Netlify for existing project
Gatsby incremental build has been such a highly anticipated feature. Without it, using Gatsby in large projects is unwise due to the poor scaling that comes with the increasing amount of content. Even for this small blog site, I've been feeling the pain, every time i need to deploy a minor fix. The upgrade process of anything is never smooth, so here are the issues I encountered. Maybe this will help some of you out there!
Step 1 - Gatsby version bump
To take advantage of the new Gatsby feature, you need to be on v2.20.4 or higher. After checking the status of my repository with ncu (npm-check-updates), I decided to bring everything up-to-date.
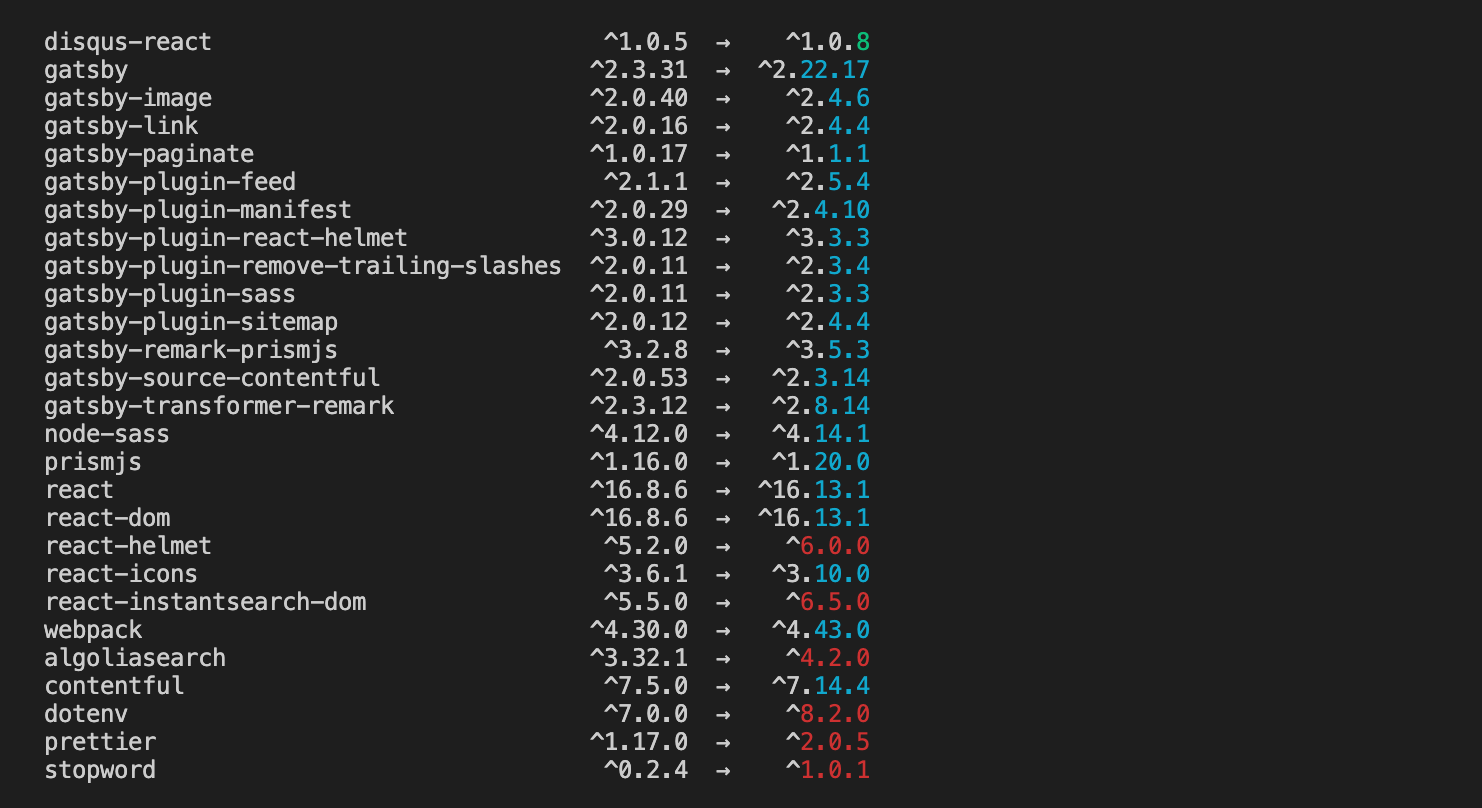
It took less than five lines to address breaking changes in the entire repository. react-helmet was the only repo's breaking change that affected the code.
Step 2 - Enable Netlify Build Plugins
The Netlify plugins are currently in beta, but from my experience, everything we are trying to do here is very stable. Click here to enable Netlify Build Plugins.
Step 3 - Add gatsby-cache-netlify-build Plugin
The new incremental build feature is based on Gatsby's new ability to cache public and .cache folders for future builds. Luckily, we only need to add two lines of text into Netlify config to take advantage of this.
You could do this in two ways, one through the UI or use the Netlify config file. I recommend the config file because it is much simpler to do and more straightforward for me to explain.
If you haven't done it already, add netlify.toml to the root of your repository. Then paste in the following snippet, and then we are done!
[[plugins]]
  package = "netlify-plugin-gatsby-cache"
If you are using other plugins, make sure you still paste in the [[plugins]]. See the example below for more information.
[[plugins]]
  package = "an-awesome-plugin"

[[plugins]]
  package = "netlify-plugin-gatsby-cache"
Step 4 - Use the new gatsby build command
Use the GATSBY_EXPERIMENTAL_PAGE_BUILD_ON_DATA_CHANGES flag to let Gatsby know to build incrementally. Change the default build command to:
 # change this original command
"build": "gatsby build"

# to
"build": "GATSBY_EXPERIMENTAL_PAGE_BUILD_ON_DATA_CHANGES=true gatsby build"
Note: There is also an optional --log-pages flag for seeing extra logs.
Step 5 - Check Node version
One of the issues I experienced is that the new Gatsby version requires Node v10 LTS version. Building with Node v8.x.x will result in the following error on Netlify.
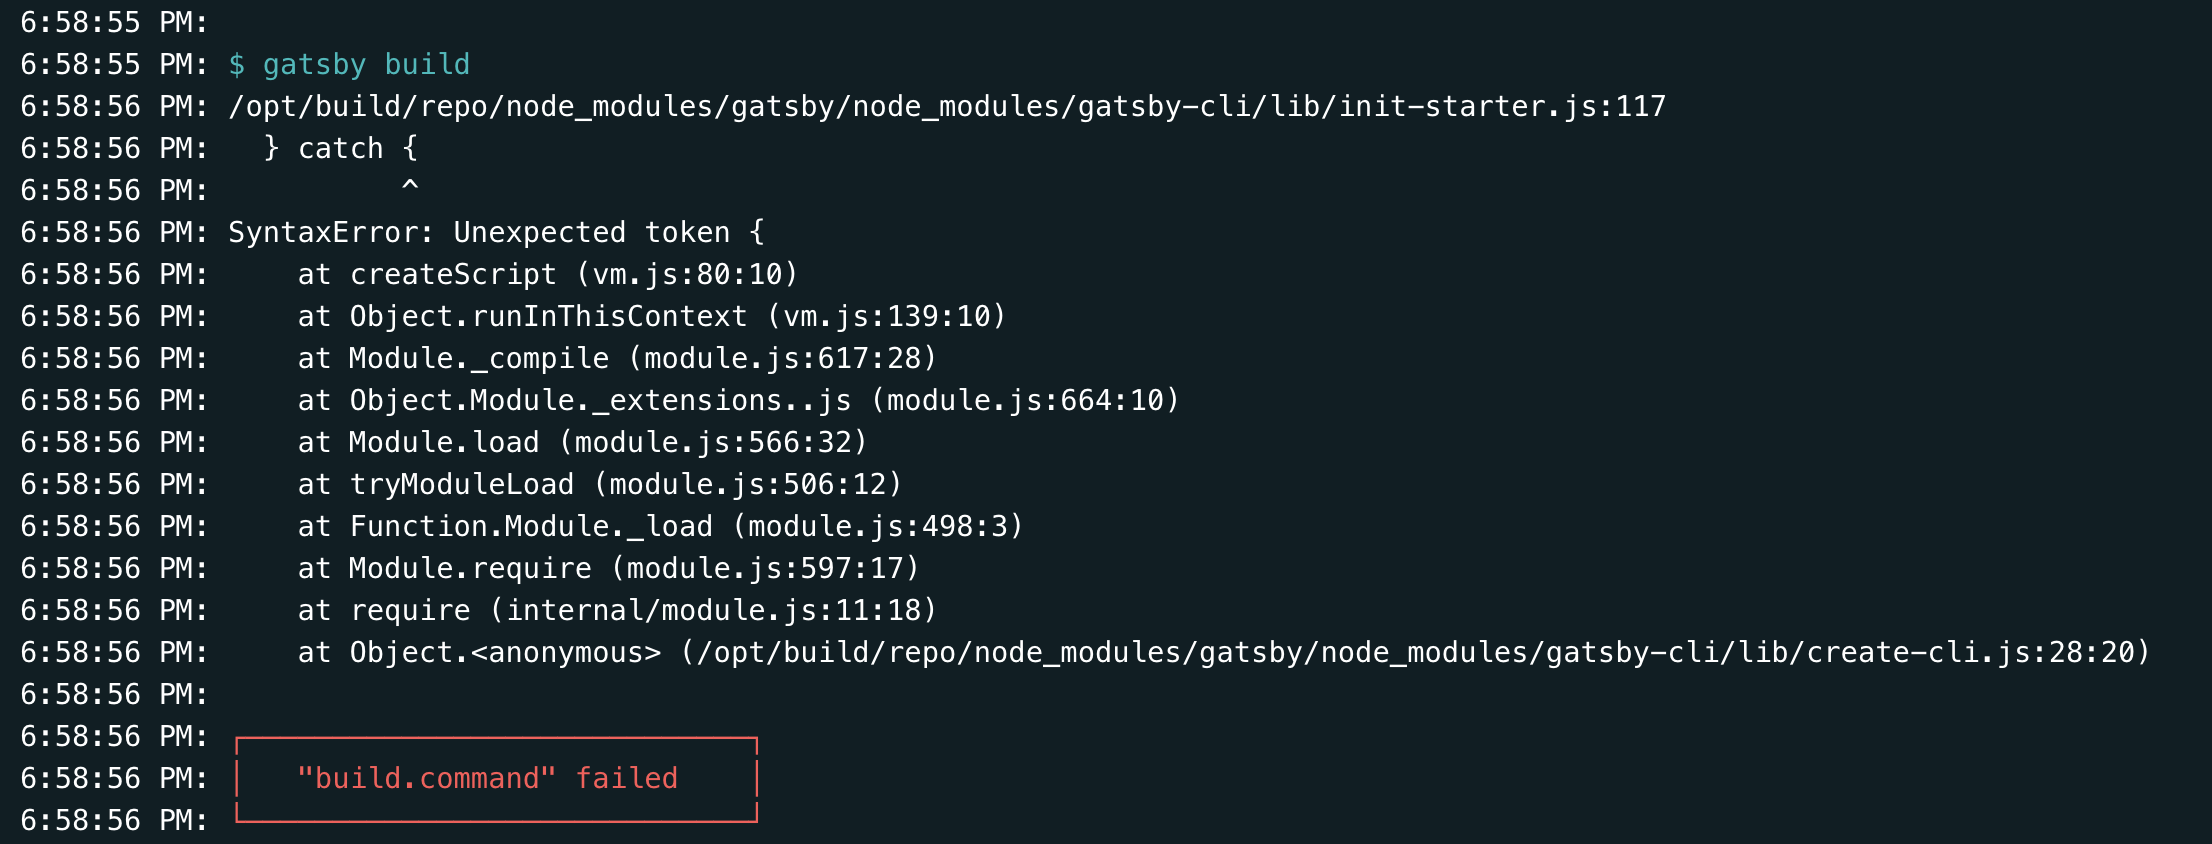
Node.js version 8 reached End-of-life status on December 31, 2019. Many of Gatsby’s dependencies are updating to Node.js version 10 and above. Gatsby must also update in order to deliver new features and bug fixes more quickly.
Add a .nvmrc file into root of the repository and paste in the following to ensure we always use Node v10 (LTS) to build on Netlify.
10The end
That is it, push all your changes and see the incremental build on Netlify :)
Update
After updating all the dependencies and turning on incremental builds, I actually saw an increase in build time on average. This might be due to all the dependencies I updated at the same time, let me know in the comments if you experience the same problem. Or am I missing something here?
Build time before

Build time after

