 Hao's learning log
How to integrate Auth0 authenticated Frontend applications with API services
Following on from the previous blog post on How to setup Single Page Applications with Auth0 in the local environment without CORS issues, I noticed another area that is very vague in the official docs and thought I'd share my finding in this post. It turns out Auth0 provided everything we needed just didn't tell us how to use it.
This blog post assumes you have a working Frontend app already. If you are not quite there yet, be sure to check out How to setup Single Page Applications with Auth0 in local environment without CORS issues if you want some tips!
Auth0's user object
If you are not aware already, on the Frontend side it is possible to request a user profile from Auth0 and it will return something similar to the following. Assuming, of course, you've got the authentication working already.
{
    email: "hao@email.com"
    email_verified: true
    family_name: "Dev"
    given_name: "Hao"
    locale: "en-GB"
    name: "Hao Dev"
    nickname: "Nickname"
    picture: "https://image.com/fake-profile-pic.png"
    sub: "google-oauth2|1924810923701923"
    updated_at: "2021-07-29T17:40:14.223Z"
}
The important thing to note here is the sub property, this is the equivalent of something like user.id we typically use to refer to a unique user in our database. If we want to store custom data about this user or user inputted data then we would save them against the sub value and later we can retrieve it using the same thing.
Attach access token to API requests
According to Call Your API Using the Client Credentials Flow section of the doc, we need to attach the access token as a bearer token in all requests headers. Which makes sense as this will allow the Backend to authenticate and verify the user without blindly trusting what the Frontend says.
Here's the node example given in the above documentation:
const axios = require("axios").default;

const options = {
  method: 'GET',
  url: 'https://myapi.com/api',
  headers: {'content-type': 'application/json', authorization: 'Bearer ACCESS_TOKEN'}
};

axios.request(options).then(function (response) {
  console.log(response.data);
}).catch(function (error) {
  console.error(error);
});
Receiving access token on Backend
On the Backend, we will need to intercept all requests that require authentication. Luckily, Auth0 has made this part very easy to find (see screenshot below).
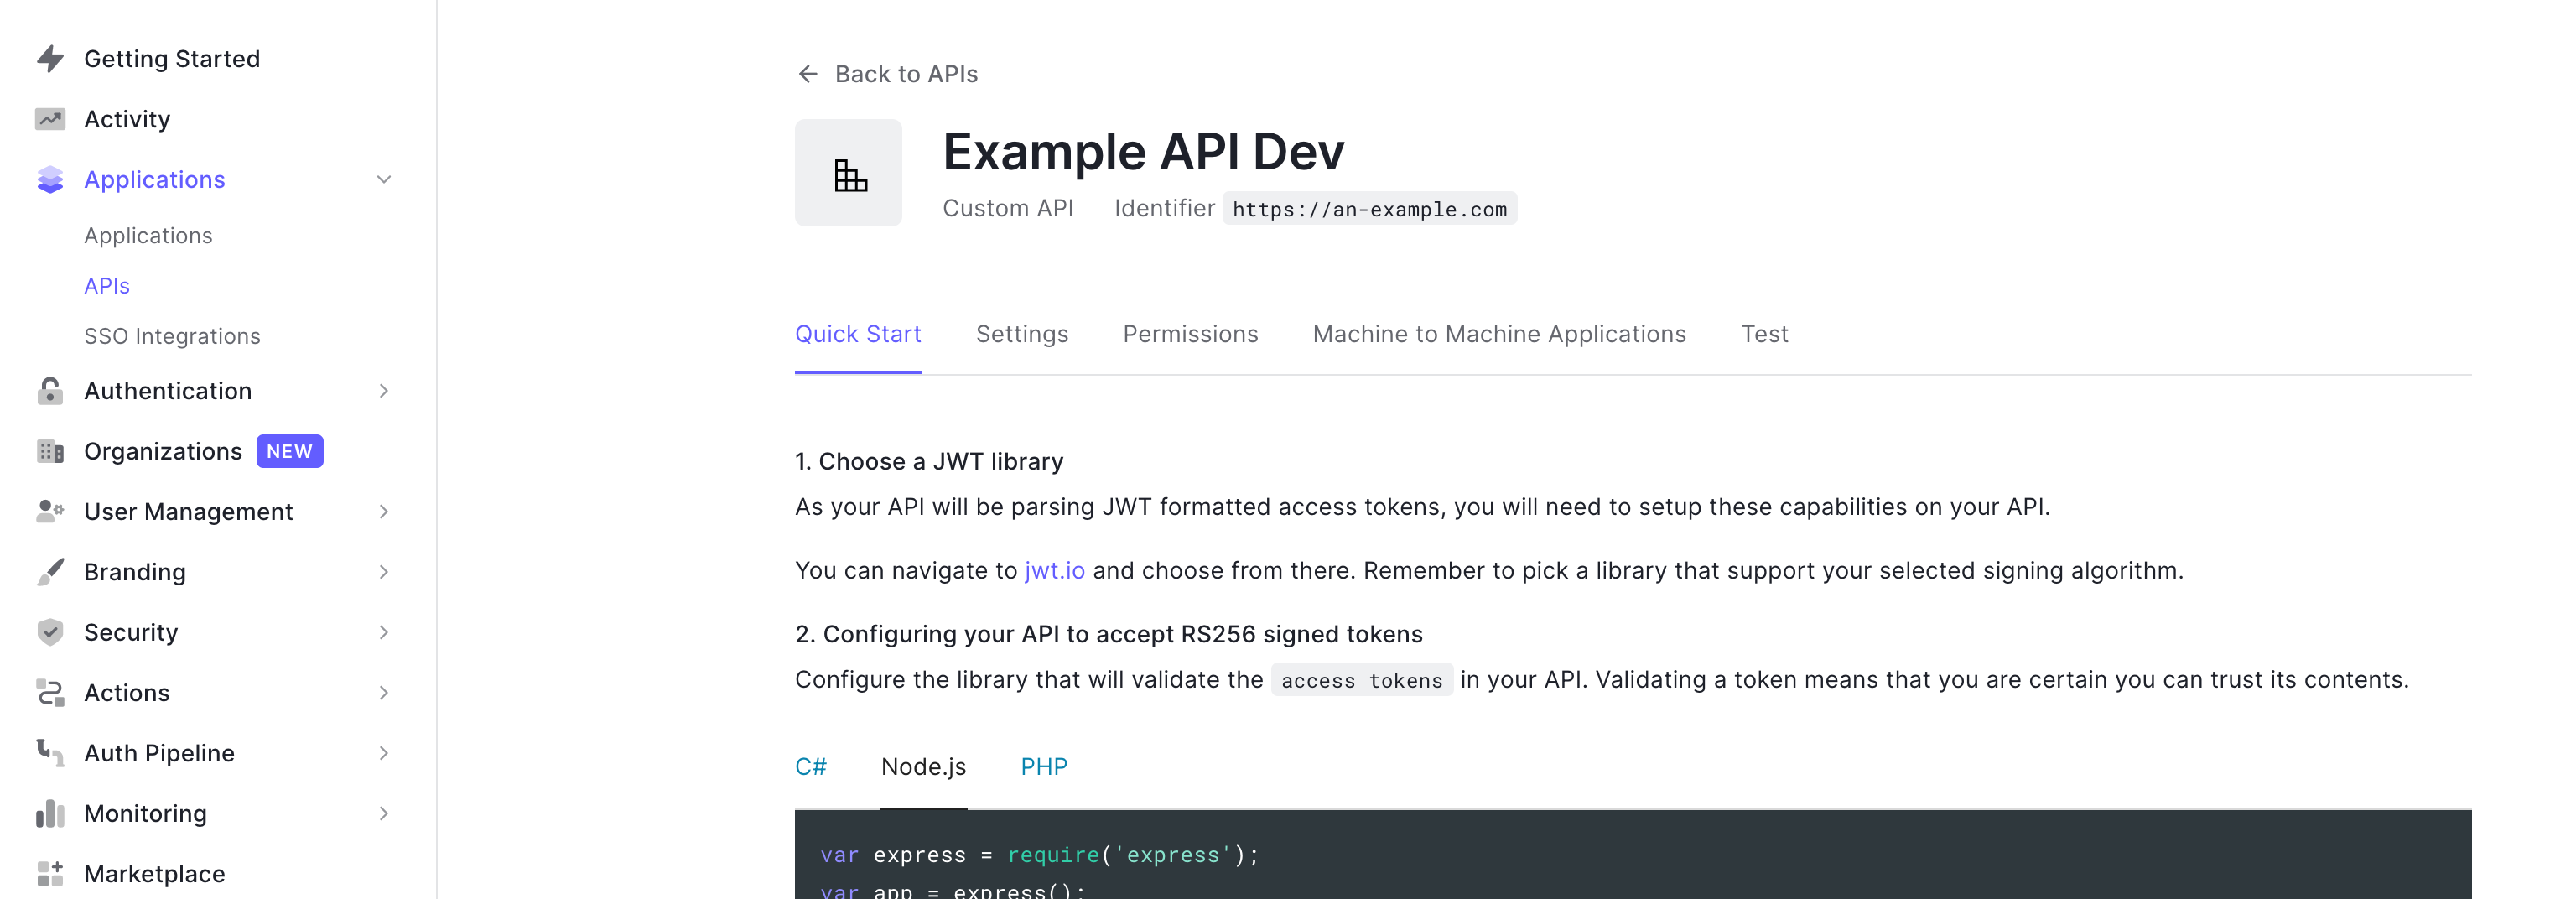
The code example given on the page is unique to each API, here is an example to illustrate to anyone who hasn't set up an API yet.
const express = require('express');
const app = express();
const jwt = require('express-jwt');
const jwks = require('jwks-rsa');

const port = process.env.PORT || 8080;

const jwtCheck = jwt({
      secret: jwks.expressJwtSecret({
          cache: true,
          rateLimit: true,
          jwksRequestsPerMinute: 5,
          jwksUri: 'https://example-api-dev.eu.auth0.com/.well-known/jwks.json'
    }),
    audience: 'https://an-example.com',
    issuer: 'https://example-api-dev.eu.auth0.com/',
    algorithms: ['RS256']
});

app.use(jwtCheck);

app.get('/authorized', function (req, res) {
    res.send('Secured Resource');
});

app.listen(port);
In this example, it shows us that we need to use two libraries here express-jwt and jwks-rsa to verify the access/bearer token passed from the Frontend's side. Then using jwtCheck() function as a middleware, the request will only reach app.get('/authorized') if the JWT token passes the authentication check.
Now we have used the access token that came as part of the request and verified it with Auth0 and made sure it is valid and haven't been tampered with.
Getting unique identifier on Backend
Apparently, jwtCheck verification automatically populates req.user if everything is successful. After checking out express-jwt documentation, it seems that it is doing all that work for us.
It is very confusing because that isn't made clear anyway in the Auth0 docs and I went through a lot of them. I was lost and confused until I saw this line in one of the example codebases which helped me to figure it out.
app.use(jwtCheck);

app.get('/authorized', function (req, res) {
        // if we can reach here, then req.user is already populated
        console.log(user.req);

    res.send('Secured Resource');
});
The console log will print out the same user object shown on the Frontend side.
{
    email: "hao@email.com"
    email_verified: true
    family_name: "Dev"
    given_name: "Hao"
    locale: "en-GB"
    name: "Hao Dev"
    nickname: "Nickname"
    picture: "https://image.com/fake-profile-pic.png"
    sub: "google-oauth2|1924810923701923"
    updated_at: "2021-07-29T17:40:14.223Z"
}
Keeping some endpoints open
Is it possible to not use app.use(jwtCheck); and lock down all of the endpoints? Yes, as far as I am aware there are a couple of ways to achieve this.
- Authenticate each endpoint/route individually
- Define
app.use(jwtCheck);after the endpoints that don't require authentication
Although in many of Auth0's examples I read that it is possible to define JWT verification on each endpoint, I never actually got the first method working myself. The following snippet is supposed to work.
// ❌ didn't work for me

app.get('/authorized', jwtCheck, function (req, res) {
    res.send('Secured Resource');
});

app.get('/unauthorized', function (req, res) {
    res.send('Public Resource');
});

app.get('/another-authorized', jwtCheck, function (req, res) {
    res.send('Another Secured Resource');
});
In the end, I went with the second approach, which works for me with no problem. It is unfortunate since the first solution would have been a lot neater.
// ✅ worked for me

app.get('/unauthorized', function (req, res) {
    res.send('Public Resource');
});

app.use(jwtCheck);

app.get('/authorized', function (req, res) {
    res.send('Secured Resource');
});
Final words
I hope this information was useful, I was stuck on this for a long time because I couldn't find any information on it.
PS: If you want to know more about authorisation checks (e.g. use Auth0's permission system) check out Server + API: Auth0 Configuration and Validate Access Tokens. Although they don't give you the code you need, it is a good place to start.
