Hao's learning log
Configuring custom CDN caching with AWS S3 and CloudFront
I recently encountered a problem where we wanted to move some assets to AWS S3 and have AWS CloudFront CDN in front of it. The great benefit of having a CDN is to reduce cost and improve performance. The get the most out of this configuration we want to have the following set up:
Client (Browser) → (no cache) → CloudFront → (cache) → S3
Note that this set up might not be right for everyone, it makes sense for us because:
- Normally, it is common to use hashed file names to indicate to browsers that they now need to use the new file instead of loading it from browser cache. But we want to avoid this approach since it would require us releasing many apps that consumes this assets.
- The benefit this brings is that we can control when to invoke cache (e.g. when we release a new version of the asset), as suppose to users caching files on their browser (e.g. if we release a new version since the browser believes it has the right version it won't try to download the latest version.
Key technology
- S3 - is used for storing the files (AWS call them as Objects) in folders (AWS call them Buckets).
- CloudFront - a CDN gateway (AWS calls it a Distribution) that we set up to just deal with caching, which would utilise all the different server farms Amazon has in different parts of the world. This is also a way to defend against DDOS attacks, since the requests never makes it past the CDN layer. It is also cheaper for this exact reason because there is no computation when requests are served by cache. Finally, this is also an opportunity to utilise AWS’s Lambda@Edge to implement logic on CDN level.
Creating a S3 bucket
First we created a standard S3 bucket with mostly default settings. This is relatively easy to do, and AWS already has a decent guide on how to do this.
Creating CloudFront Distribution
Then we set up a CloudFront Distribution with these changes:
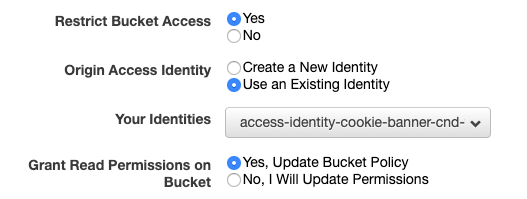
- Make sure that it is not possible to access Bucket files directly via URL, and to grant the Distribution access to the Bucket (so it can cache and serve it). Identify could be new or Existing depending what makes more sense.
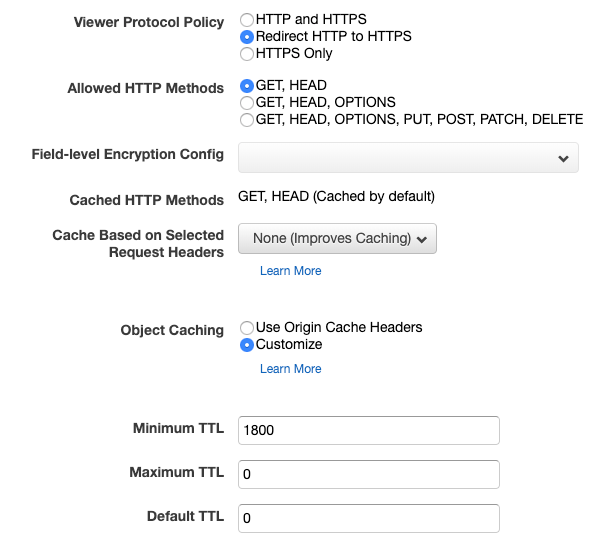
- Then change some of protocol to make sure we always to try serve with HTTPS. For Object Caching we select
cusomizeand give the TTL appropriate values.
For more information about the full set up, here is an official AWS YouTube video explaining in detail how to create a new distribution: https://www.youtube.com/watch?v=KIltfPRpTi4
Testing Cache is working correctly
This AWS documentation suggest that it is best to use TTL option in CloudFront Distribution (see above screenshot) to control the cache here: AWS CloudFront → (cache) → AWS S3. Then use HTTP headers to disable cache between: Client → (no cache) → CloudFront.
Here’s the quote taken from the link above:
For web distributions, you can use Cache-Control or Expires headers, and CloudFront minimum, maximum, and default TTL values to control the amount of time in seconds that CloudFront keeps an object in the cache before forwarding another request to the origin. Headers values also determine how long a browser keeps an object in the cache before forwarding another request to CloudFront.
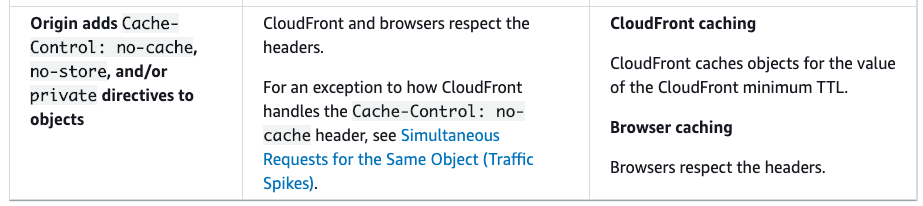
Here explains how the headers and TTL works together. The thing to note here is that we need to use the minimum TTL in conjunction with Cache-Control: no-cache header.
With the above understanding, then we tested our assumptions with the following test:
- Upload a file.js (v1) to S3 bucket and then set the minimum TTL on the Distribution to 1800 seconds (30 mins).
- Then try to request the file via the browser (goes to CloudFront) which returned file.js (v1) as expected.
- We then uploaded a file.js (v2) to the same S3 bucket which replaced file.js (v1).
- We tried to request file via the browser and got back file.js (v1) still, this means the minimum TTL is working. So this part is correct: AWS CloudFront → (cache) → AWS S3.
- We then busted the cache on the Distribution.
- We request the file again via the browser and got back file.js (v2), this again proves that CloudFront is the one providing the cache and cache isn’t coming from the browser.
Here's a simpler version in the form of a sketch to illustrate the above:
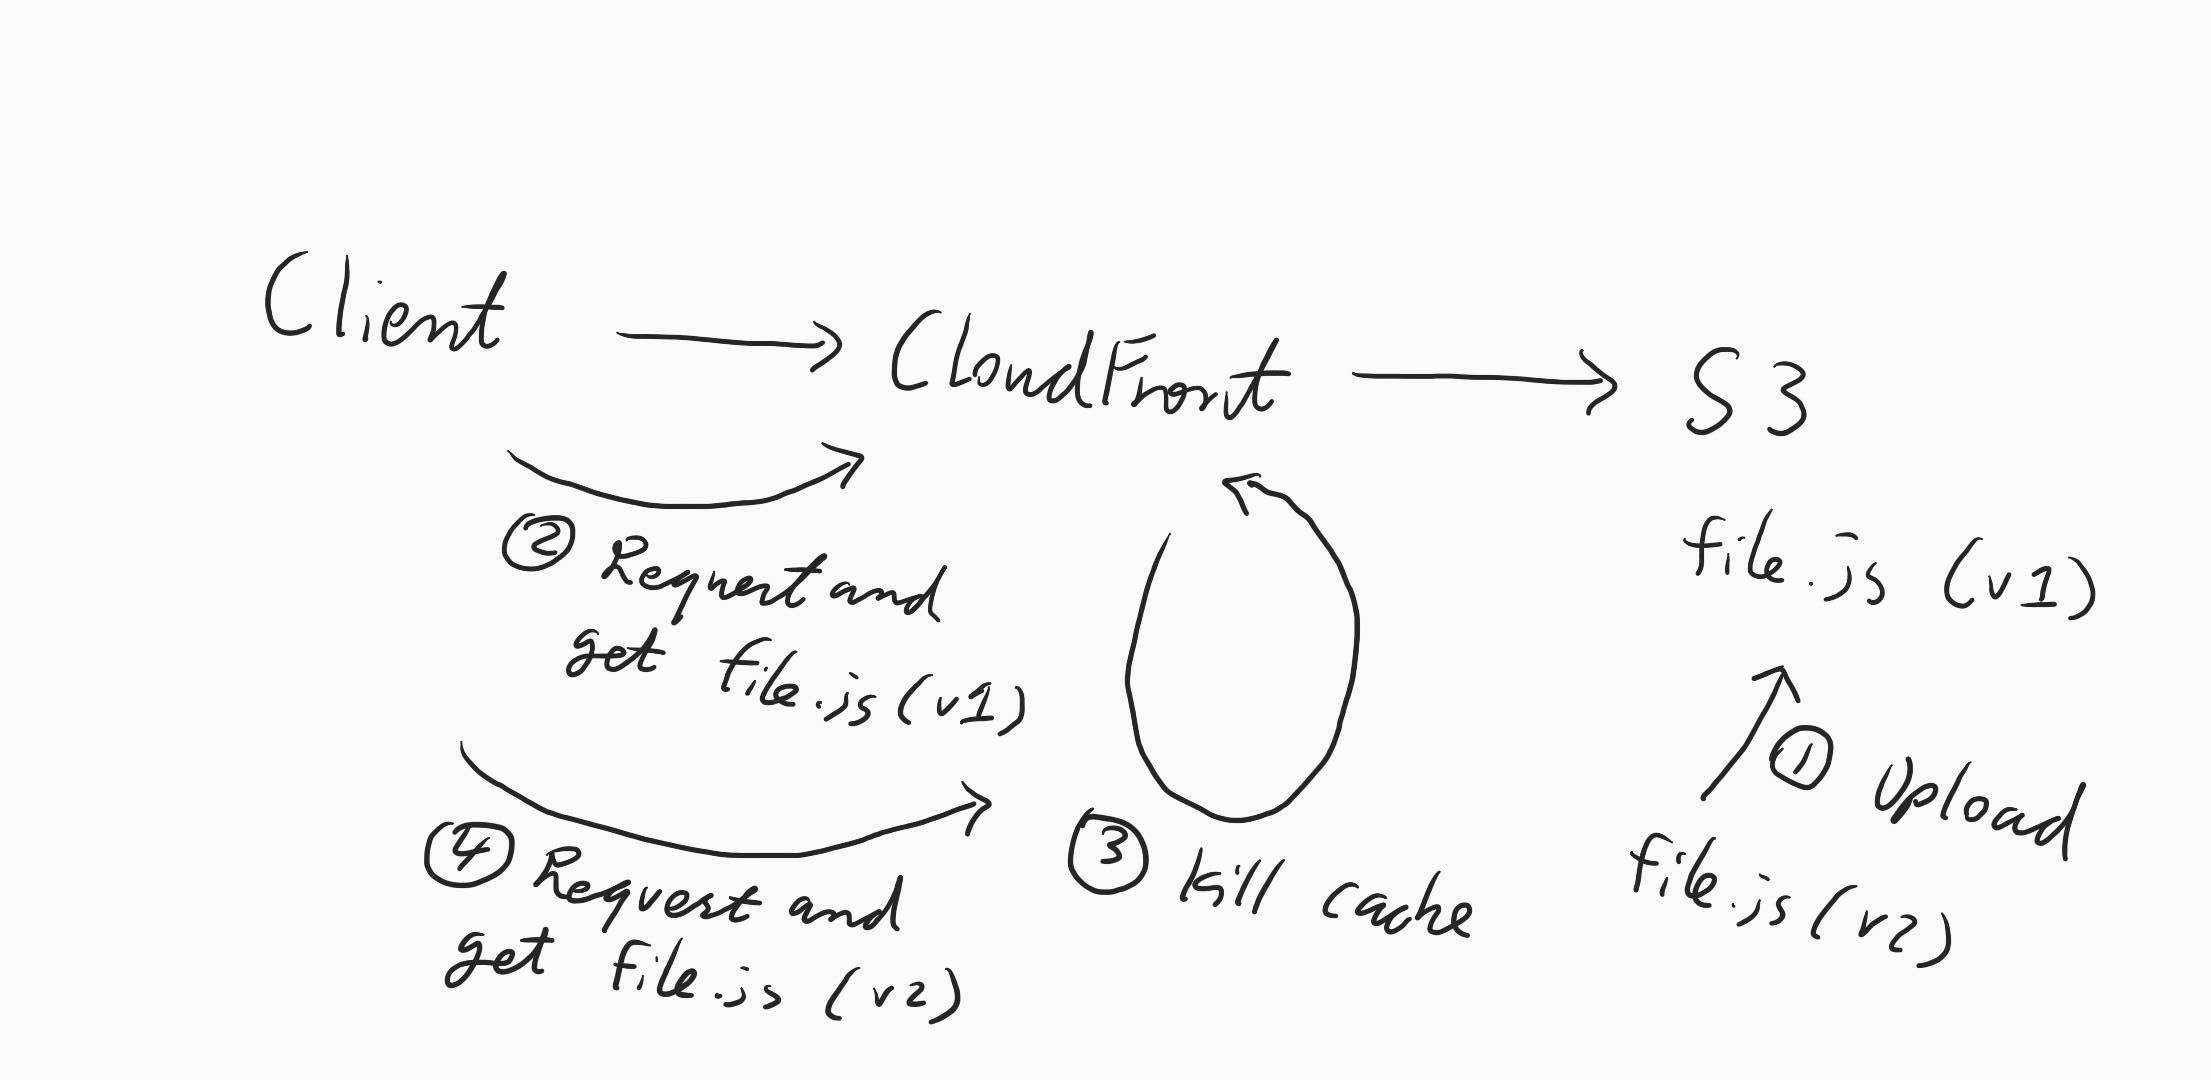
The browser header is set to no-cache as well in this case, so we can be sure that we are just testing the CloudFront.
Invalidate Cache
As mentioned above, we want to be able to bust the cache after we re-release the asset. It turns out this is quite easy to do with the AWS console.
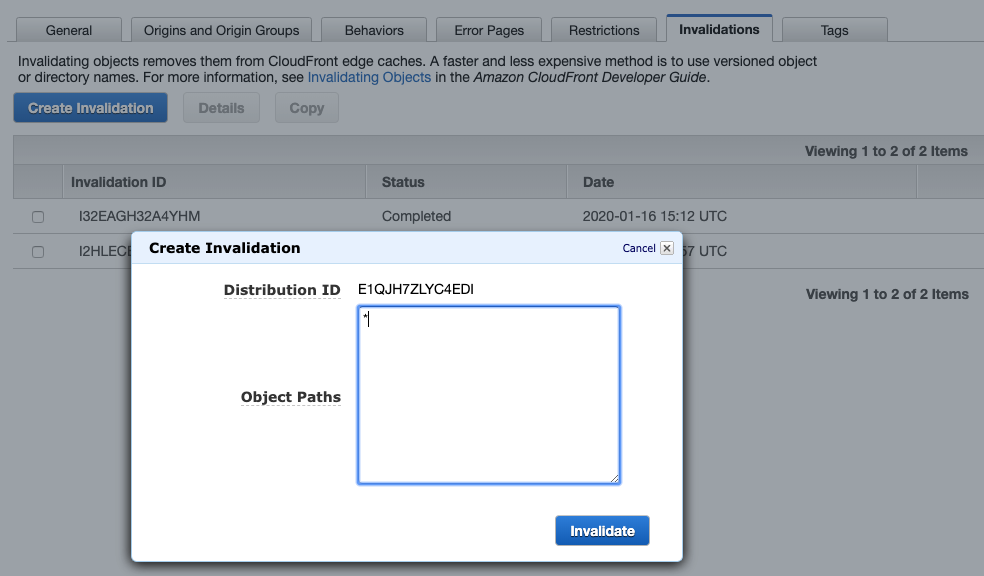
It is also possible to do it through AWS CLI, which we can use to invoke cache as part of the CI pipeline after we released a new version (see official doc).
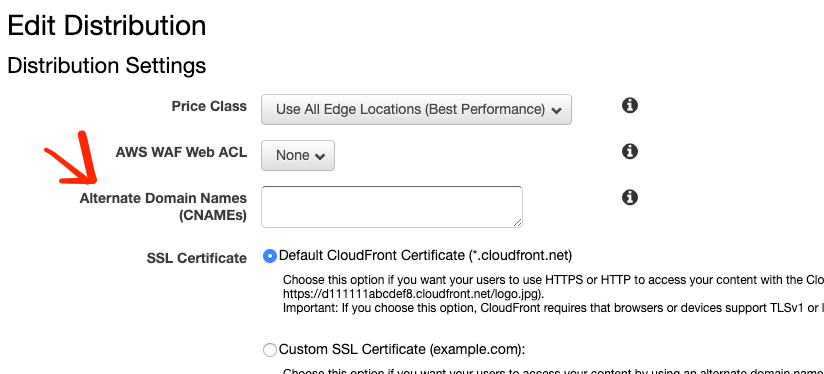
Custom domain name
If you don't like using the default CloudFront url (e.g. https://wiebfpweufpwubfe.cloudfront.net), it is very simple to update the CloudFront Distribution to use a custom domain.